Wednesday, August 17, 2011
Well, I'll admit, it's been a while. I have been running around like a crazy person this summer and haven't had much time to blog. Now that the summer is coming to a close, I wanted to write about some of the fun things we did this summer.
This summer, we learned all about nature beginning with one of my favorite subjects: BUGS!
We learned all about these creepy crawlies and what makes them tick. We practiced our drawing skills by drawing pictures of bugs, tried (unsuccessfully) to create an ant farm, and made our own awesome diagrams of the inner workings of an ant mound.
Prior to working on the diagram, I showed the children pictures of the inside of an ant mound and how the different chambers served various functions. I kept it pretty simple: Worker aunts are at the top of the nest bringing in food for the queen and rest of the colony. Just below the workers live the larvae. The queen is in a chamber in the center of the nest, and food storage is at the bottom.
Here is what we did...
Materials:
- Peel and stick shelf liner paper
- Construction paper
- Crayons or markers
I took various colored pieces of construction paper and pre-cut them
 into various sizes of ovals and tunnels. I taped the sticky paper up on the wall with the sticky side out, and organized the children into teams of two. Then, I invited them to stick the construction paper tunnels and ovals onto the paper connecting the tunnels and chambers (i.e. ovals) any way they wished. Finally, we drew in pictures of aunts, larvae, the queen, and food stores. I think they turned out great!


Friday, February 25, 2011
 The idea here is that you are making simple bird feeders, while working on the children's fine motor skills by having them thread Cheerios onto yarn. This sounds simple, but like everything involving children... it is not as simple as it seems. :)
Here's what you'll need:
- Colorful yarn
- Cheerios
- Small bells
- Glue
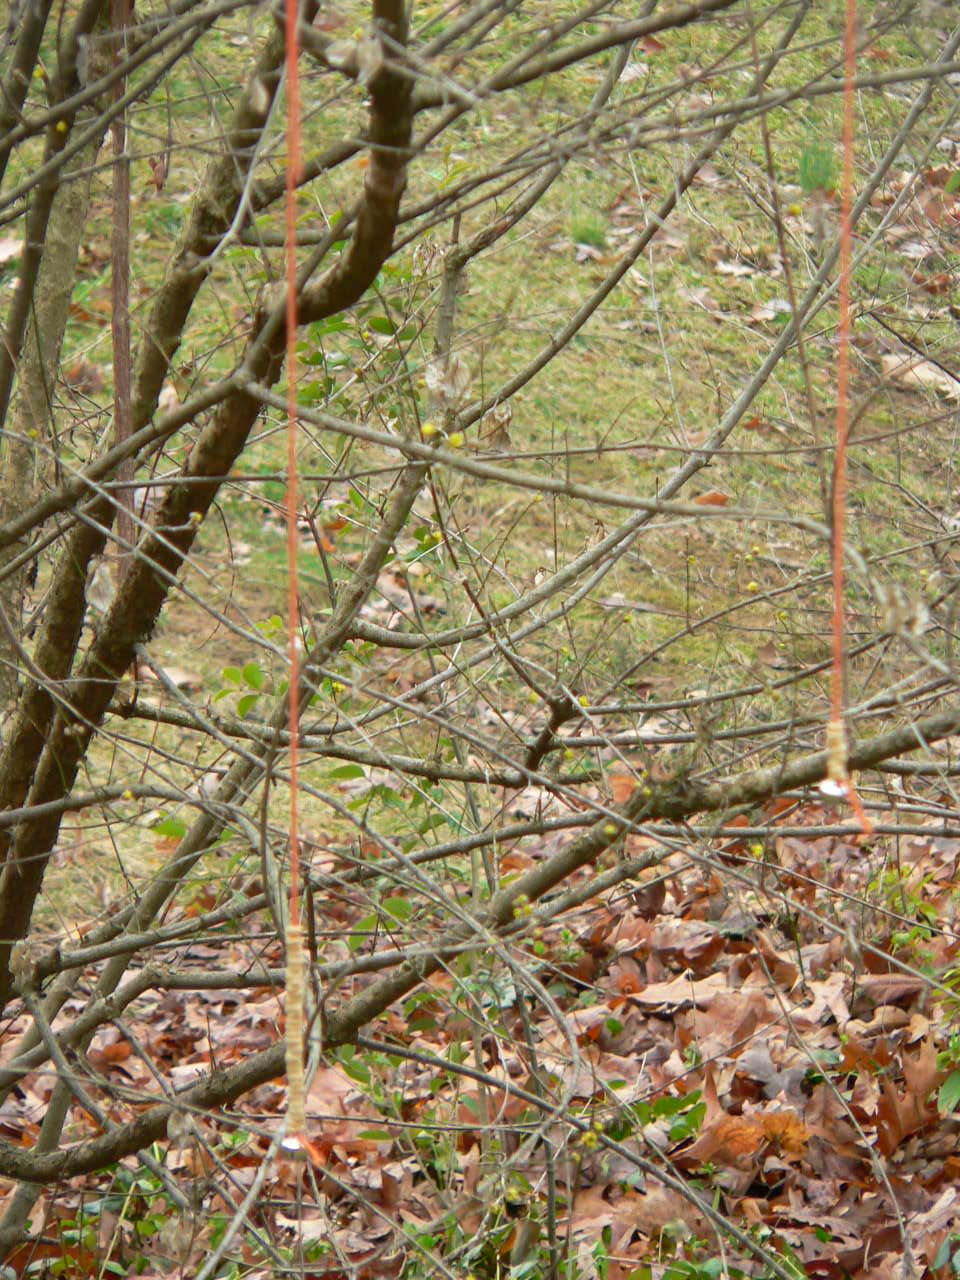
Once you have everything prepared, the actual activity is super easy. I took the kids outside so I could leave it to the squirrels and birds to clean up any mess. I placed bowls of Cheerios in the center of the tables, and let them thread as many as they wanted onto the string. Once finished, we hung them on a tree outside our classroom window so we could see if any birds ate from our feeders.
 I don't think the birds have figured out that these are food yet..
If nothing else, it looks really pretty. ;)
Sunday, February 13, 2011
This is a project to help improve the children's motor skills (cutting , folding , gluing, and stapling), but even more so, it is meant as a literacy activity. Through this project the children created their own books with pictures, and told stories to accompany the images. This is a tall order for three year olds, but the children proved once again that they are capable of doing amazing things with just a little bit of scaffolding.
My kids are still in the early stages of representational drawing, and I really wanted to work on their cutting skills, so I made this animal sheet. It has a number of animals for them to choose from, they just have to follow the lines with the scissors to cut them out. I made it this way because they have a tendency to snip around the edge of the page, and I wanted them to start cutting through the paper.
Click here to download the animal cutting sheet
All of the images were downloaded for free online.*
Next, I helped the children fold two pices of paper and staple them on the fold to create a book. They pasted the cut-out images, one to each page, in the book. I placed wax paper between the pages to keep them from sticking together. Once the glue was dried, the children could color the images.
Finally, I asked the children to name their books and tell me stories based on the pictures that were inside. I was very impressed with their stories, and wrote them on the inside of their books. Here is an example of one of the the books.
The child wrote:
Cow is moo.
Duck is quacking, and dog is ruffing.
And the elephant is swinging his trunk, and the seal is going in the water. 
There is another story one of the children wrote:
My giraffe reaches out his neck and get leaves,
and my seal swims.
My snake does climb to trees and he goes like this on the ground (acted out :) )
Doggie licks and we pet him.
My turtle's my friend too.
I had another one who sang all of Old Mac Donald, and another who named her snake lion and her gorilla princess, and said they liked to play games on the computer. :)
All of them were original and soo cute. This activity is definitely a keeper.
One caveat....
I gave myself 2 days for this project, but it took much longer. I still haven't gotten all of the children to dictate stories to go along with their books, but most have. I would reccomend that you give youself a couple weeks to work on this while doing smaller daily activies.
*Web sites
- http://animalspiictures.blogspot.com/2010/08/animal-coloring-pages.html
- http://www.coloringpagestube.com/
- http://www.craftsandcoloringpages.com/free-printable-coloring/
- http://www.911coloringpagestoprint.com/
- http://www.coloringpageskingdom.co
- http://animalspiictures.blogspot.com/2010/08/animal-coloring-pages.html
- http://www.kidsandcolors.com/coloring-page-44.html
- http://thecoloringspot.com/animals/animals-set-9.html
- http://www.eprintablecoloringpages.com
- http://www.kidsandcolors.com/
- http://www.tiptopglobe.com/f
- http://www.coloringpages1001.com/coloring-pages/giraffe/
Friday, January 21, 2011
This is a project we did as part of a unit on winter and polar animals. To create the template, I took the picture I found of a teddy bear outline, (http://twistynoodle.com) inserted it into word, and wrote "My polar bear's name is.." underneath it.
For the class... I gave the children just the glue and the template to start off, and I showed them how to cover the entire inside of the template with the glue. Next, we used medium sized cotton balls to stick to the glue. Once most of them were finished, I talked to the group about what the bear was missing. With a little encouragement they figured out that he needed eyes, a nose, and a mouth. I then set out some plates with various materials on them: cut pieces of string, buttons, pom poms, and googly eyes, and let the kids go for it.
I have these displayed in the room right now, and they are pretty hysterical. I have some with 20 eyes on them, and others with nothing but buttons.

The children got pretty creative with the names they gave their bears as well. We had our fancy bears: Gabriella and Eala. Our islander bears: Tiki and Jaga. Our country music bear: Hank-O-Mise. Our traditional bear: Snowflake. Our big bear: Tiny. And last but not least the undefinable (and my personal favorite): Chicken. :)
Like many of my projects, I adapted this idea from one I got online. It is quite simple actually... You give the children pasta wheels, and have them glue them together with regular school glue, give it a day or two to dry, then paint it with white paint and silver glitter. Once they're dry, you can tie a string on one end to make them into ornaments. (I didn't do this since it was past x-mas time when we did it).
 (These really weren't this shinny... it's just my flash.)
- Do this on wax paper. You don't want to have to pick them up until they are dry, and once dry they will just stick to anything else.
- School glue really does work, but try to make sure the children glue them in a bunch, not a line. I had some that did really neat designs pasting the wheels end to end, but they fell apart when I tried to remove them from the wax paper. An idea may be to draw little circles on the wax paper and ask the children to fill them in. I didn't do that.. it's just a thought.
- I used the small pasta wheels because I thought it would be a good fine motor activity for them. It was, but I do think they would have looked much grander if we had used the larger ones. I also think they probably would have been easier to paint.
All in all... it was a cute 2 day project the kids really enjoyed.
Tuesday, January 18, 2011
This is such a simple idea, but it touches on so many important concepts: fine motor skills, ordering by size, and producing representational art.
For this activity I made white playdoh. (To make white play-doh, just follow the Homemade Play-doh Recipe and omit the food coloring). I also used some red play-doh that was ready to be replaced.
First, we talked about how a snowman looked. I drew a picture on the white board showing how a snow man was made up of three balls that got progesivly smaller as they were stacked on top of each other. Then, I showed (i.e. reminded :) ) the children how to roll play-doh into a ball by rolling it on the table. One at a time, we rolled the play-doh into 3 balls (small, medium, and large), and stacked them up largest to smallest. Next, we rolled the red play-doh into a snake, and placed it around the snowman's neck like a scarf. Finally, we added pipe cleaners for arms, and drew the faces on with marker. Here's one that a little girl in my class did. So cute!! Tip: Place them on wax paper and give them a couple days to dry. They harden nicely but are very fragile.
Thursday, November 4, 2010
This is such a fun and easy sensory activity for little ones. Best of all, it's completely non-toxic. The neat thing about goop is that it feels solid when you pick it up, but melts in your hands. The children were so fascinated by this (at least the ones that would get their hands dirty :P) that they kept playing with it for probably 45 or more minutes.
Ingredients
- Cornstarch
- Water
Directions:
- You will want to start with a little bit of cornstarch in the sensory bin (approximately 2 cups). Ask the children to describe how it feels.
- Next, add and equal amount of water, and have the children mix it until the cornstarch is mostly dissolved.
- Continue adding cornstarch and water until your sensory bin/ table is filled and it is the consistency you like.
Depending on the ratio of water to cornstarch, the goop will behave differently. Play with it and explore how it feels. It's super fun!
***Tip: Do this outside. It gets really messy, but is a breeze to clean up with the hose.***

This was a great activity that I wanted to share. I did it for Halloween, but you could also do it for Thanksgiving.
I got a large carving pumpkin and placed it in my sensory bin (outside - this gets messy). First, I asked the children what was inside the pumpkin (teasing them that it was full of kitty cats or bunnies, etc.). Next, I cut open the pumpkin and we all removed the insides and placed it in the sensory table for them to explore. We talked about how the pumpkin insides felt - wet, slimy, slippery etc. and worked together to separate the seeds from the stringy goop. (I reserved a few seeds for us to plant in the garden.) I explained to the children that we were going to cook the pumpkin seeds, and filled up a pot to boil water on the stove. We boiled our seeds for 10 minutes on high heat. Afterward, the children helped me stir butter into the seeds, spread them on the pan, and sprinkle salt over them. We placed the seeds into the oven (275 degrees) and cooked them until browned.
Later we took the reserved seeds and insides, and planted them in the garden in the backyard. We'll see if they grow. :)
The great thing about this activity is that it was like a million lessons in one:
- We predicted what was inside the pumpkin
- Used our vocabulary to describe how the pumpkins insides felt
- Worked our fine motor skills removing the seeds from the stringy insides
- Discussed how water boils (I asked them questions like: "how do we boil water? and "What does water look like when it's boiling?" I also showed them what the water looked like when it was boiling)
- We talked about stove and oven safety
- Learned about how butter melts when heated up
- Counted the number of minutes to boil the water and cook the seeds
- Saw how the seeds changed when cooked
- Planted the seeds in the garden.
***And when we were done with the pumpkin, I got a bunch of tees and we beat them into the pumpkin using plastic hammers - a good gross motor activity. ***
Overall, this was an awesome activity. My only complaint is that the seeds took too long to cook, and they weren't finished before the children went home. My oven is a little strange (gas) and sometimes recipes take longer than they should to cook in it. Next time, I will have to cook them at a higher heat.
Thursday, August 5, 2010
This was sooo much fun! It's messy though. Remember to put paint shirts on the kids, and be prepared with paper towels and spray cleaner.
First you have to make the ice cubes. Here's what you'll need:
- Ice cube trays
- Popsicle sticks (you can get small ones or break them in half)
- Aluminum foil
- Liquid watercolors (This is the key. Using food coloring does not turn out nearly so bright and colorful. I have only found these at Discount School Supply.)
Here's how to make them:
- Take the ice cube tray and fill each section 3/4 of the way full with the liquid watercolors. I used red, yellow, and blue so the children could see how those colors blend to make secondary colors. One tray will go a long way. I used one for about 10 kids, and I had a good bit left over.
- Next fill each section the rest of the way with water.*
- Place the foil over the entire tray pressing it down so you can see the divisions between the sections.
- Finally, push a popsicle stick through the foil in each section (you may want to pierce the foil with a knife first). The foil will hold the sticks up straight until the water freezes.
- Let it freeze overnight.
The activity:
Before you begin, explain to the children that these are paints and must not be eaten. They're non-toxic, but do temporarily stain the skin. Twist the tray to release the cubes, and place them in a small container in the middle of the table for the children to share. These totally bleed through paper, but are pretty easy to clean off of hard surfaces. Clothes, however, well that remains to be seen. :P
Here are a few of the pictures. The lighting isn't the best. They are even prettier in person!

* Be careful to leave a little space at the top, or you'll have nothing but brown ice cubes. ;)
Thursday, February 11, 2010
This activity was a hit with my 2-3 year old class. The younger ones needed a little help with the pipe cleaners, but it was a great way to work their fine motor skills, and teach them a little about spiders.
What you'll need:
- Play-doh (Homemade play-doh recipe)
- Pipe cleaners
- Cheerios
- Wax paper
Directions:
- Give the children a palm (your palm) sized chunk of play-doh.
- For older children you can have them work it into a ball, but you will probably have to help the younger ones. Wrap their hands around the play-doh to show them how to mold it, and then show them how to roll it in their hands or on the table to help round it out.
- Next give them eight pipe cleaners and have them stick them into the top of the play-doh any way they want.
- Once they're finished, flip over the play-doh, spreading the pipe cleaners to the sides, and have them push it down with the palms of their hands.
- Finally, place a bowl of Cheerios in the middle of the table and let them press as many as they want down into the top of the spider. They will probably eat more than they place on the spider, but that's all part of the fun.

Here's what one of our final ones looked like. I personally like color, but you could definitely use black play-doh and pipe cleaners if you want a more traditional looking spider.
Wednesday, December 23, 2009
With this activity, I've taken the typical paper snowflake and jazzed it up a bit. It is very simple to do, and since the paper is thin, it takes less strength to cut making it a good activity for preschool children. This does take a bit of skill using scissors so it would probably be best for children 3 and up - possibly younger with a lot of help. My 4-year-old was able to do it all by himself.
This is what you'll need
- One 4 cup round coffee filter (white)
- Markers
- Newspaper
- Spray bottle
- Scissors
- Lay out the newspaper and flatten the coffee filters out on
 top of it.
 - Have the child(ren) color the coffee filter with markers - making sure they use a lot of colors.
- Once they have finished coloring their filter, have them spray it with water until the colors start to blend.(Make sure they don't spray too close - you want them to mist, not soak, it)
- Leave it on the newspaper to dry.
- Once the filters have dried, remove them from the newspaper.
- Have the child fold the filter in half, then in half again


- Next, show them how to cut the filter on all three sides, making sure to leave portions of the folded area connected.
- Unfold, and voila! Tie-dye snowflakes! :)


Variation: If you want to make these look more traditionally tie-dyed:
- Grab the center of the filter and pull the ends together like a cone.
- Tie rubber bands or twisty ties around the filter.
- Color and spray.
- Let dry.
- From this point you just follow the same directions as above.
Monday, December 7, 2009
I used to teach art so I do a lot of art projects with my son. Here are a couple projects we did recently using unusual items for painting.
String Painting
This is one I'd never done before. Sebastian wanted to play with some of the string we got at the store, and I was going to try to teach him to braid and tie knots, but then he said he wanted to paint so I thought to combine the two. I simply squirted some paint on a Styrofoam tray, and placed one piece of string in each color. We used a plastic fork to push the strings into the paint because Sebastian didn't want to get his hands dirty (don't even get me started on that :P). I would show him one way to paint with the string, and give him a little time to try what I showed him before introducing another method.
We tried:dragging the string, laying it down carefully in straight lines, lightly tapping it on the paper, and running it carefully along the paper in curved lines. I think it turned out great! And we had a lot of fun!
Knife and Fork Painting
Before I even begin... yes I'm talking about PLASTIC forks and knives. Jeez, what kind of mother do you think I am. ;)
This project actually came out of the string painting project. Sebastian wiped the fork we were using on the paper, and I was curious to see what he could do with it. I introduced the knife later after I realized what a cool idea this was. The great part about this project is watching them explore all the different ways they can make marks using the fork and knife. Sebastian really experimented with the utensils - especially the knife. He spread the paint like butter, scratched the paint with the serrated edge, sliced at the paint.. everything. The fork couldn't hold much paint but made great scratch marks on the paper and cool dots. I'm going to try thickening the paint next time and see how that works. I'll let you know....
Here is his painting. I love it!!
Friday, November 27, 2009
A lot of early childhood education books advise teachers to allow children the opportunity to work their motor skills by hammering nails into wooden boards. While I agree with this in theory, giving my son access to a weapon and free reign to beat the tar out of a bunch of nails in a board is a little beyond my comfort zone. And I certainly don't want to be responsible for the damage one of my students might inflict on themselves or my home using one of these boards. So when I came across this idea, I thought it was a winner. I would still advise that children are supervised when using the hammering board, and I wouldn't give it to children under the age of three, but that's your call. As you can see from the picture below, this was a real "hit" with my son. (He-he).
What you'll need:
- Three fabric bolts (You can get these for free at any fabric store, but make sure they are the kind that are completely enclosed)
- Duct tape
- 2 inch golf tees (natural wood)
- Hammering tool (plastic hammer, or a wooden/rubber mallet)
- Container for holding the tees (Dollar store)
Directions: This is too simple!
- Duct tape the three bolts together, by wrapping the tape around each end.
- Use the container to hold the excess tees.
- Show the child how to position the tea and hit it, and let them go at it.

We used a plastic hammer, but I would think a small rubber mallet would be ideal. For the life of me I could not find a single wooden or rubber mallet ANYWHERE! If I find one, I'll let you know. Also, we used white tees, but the paint chipped off everywhere so plain wooden ones would probably be a better bet. Happy Hammering :).
Thursday, November 26, 2009
These boards are a great way for little ones to work on their hand-eye coordination skills. They're usually for children 2 and up who are learning to dress themselves, but even my 13 month old enjoyed working the zipper frame.
These are pretty expensive new, and really easy to make, so it just makes sense to do it yourself. Dollar store wooden frames work great! I used one of my daughters sweaters, but the other two I got for really cheap at a consignment store.
What you'll need:
- 5X7 wood frames
- Needle nose pliers
- Infant clothing - 3 or 6 months - with zippers, buttons and/or snaps
- Chip clips or clothespins
- Staple gun and staples (approx 1/4 inch)
Directions:
- Remove the glass and backing from the frames.

- Using the pliers, carefully remove the metal tabs from the frames.
- Fit the clothing over the frames and lay them button side down.
- Bunch up the excess clothing in the back, and secure it with chip clips or clothes pins. (Don't pull to tight or the buttons will be difficult to manipulate)
- Staple the clothing onto the frame leaving at least and 1 to 1 1/2 inches between staples.
- Remove the chip clips and fold the excess material so it lays flat. Staple it to the frame using the spaces between the first set of staples.

Here are the ones I made. Next I need to figure out how to make a lacing frame. They just don't seem to make bustiers for infants. ;)

