Wednesday, March 2, 2011
Okay... so remember that comment about sharing my utter failures. Well here's one you can definitely sink your teeth into.
This project started out as your typical grain and seed collage. I put together a mixture of grans and bird seed I got at the store, and had the children spread glue on a paper plate any way they wanted. Then they sprinkled the seeds onto the plate, and dumped the excess off so the seeds stuck to the glue creating a design on the plate.
Here's the thing... this was cute, but kind of blah.
So I had this inspiration! I thought it would look really neat if the children painted their collages. The following class, I gave the children a mixture of glue and paint in red, blue, and yellow. Well, as is often the case, the children just didn't follow my idea of what they would do. They mixed the paints, and spread it on very thickly creating what I have dubbed... "Vomit on a plate."
I figured it wouldn't be a very good idea to post an image of them for the sake of anyone who is unfortunate enough to be eating as they read this. ;)
In closing... don't try this one at home kids.
Friday, February 25, 2011
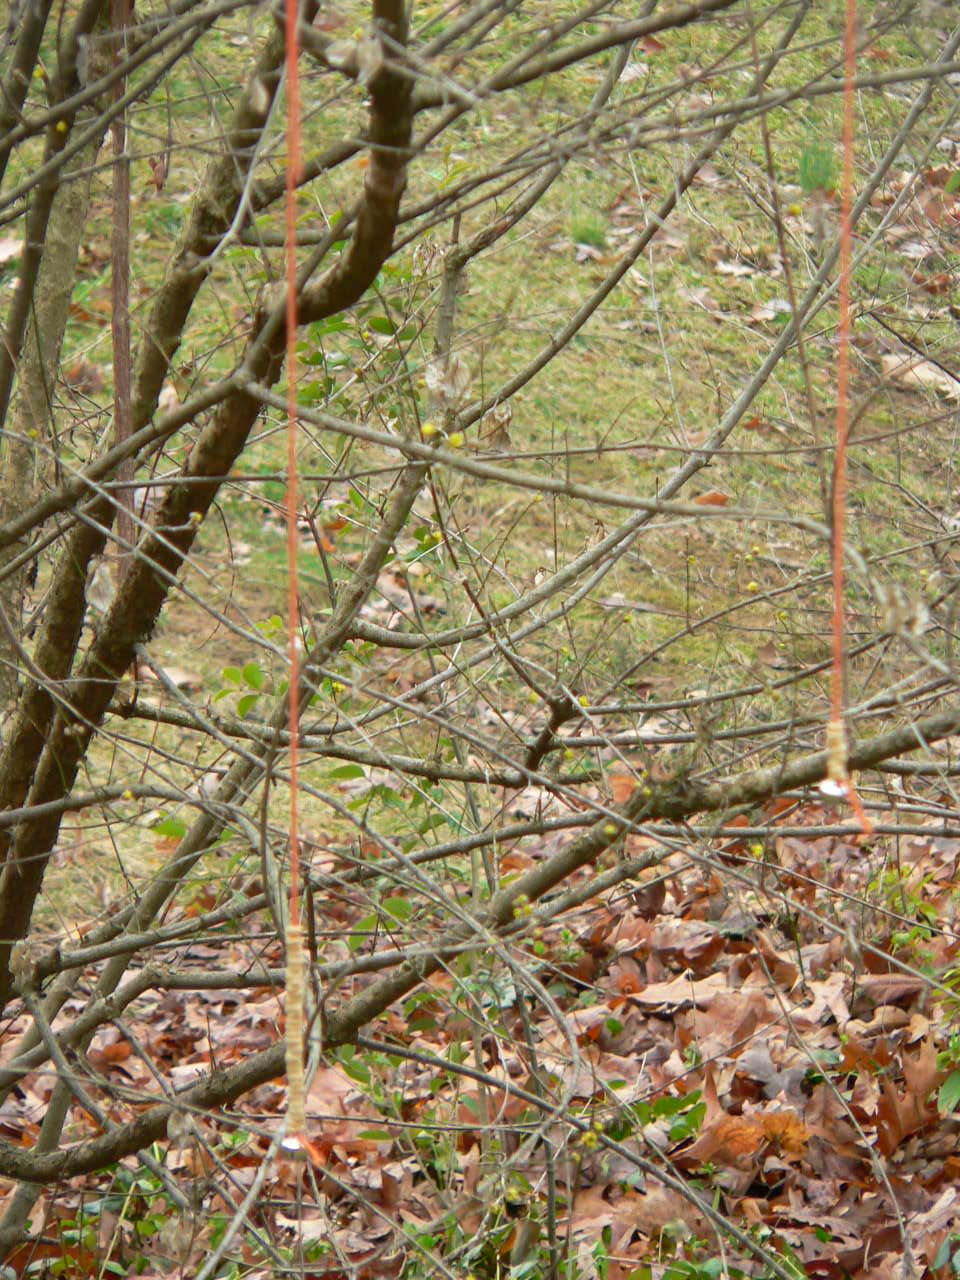 The idea here is that you are making simple bird feeders, while working on the children's fine motor skills by having them thread Cheerios onto yarn. This sounds simple, but like everything involving children... it is not as simple as it seems. :)
Here's what you'll need:
- Colorful yarn
- Cheerios
- Small bells
- Glue
Once you have everything prepared, the actual activity is super easy. I took the kids outside so I could leave it to the squirrels and birds to clean up any mess. I placed bowls of Cheerios in the center of the tables, and let them thread as many as they wanted onto the string. Once finished, we hung them on a tree outside our classroom window so we could see if any birds ate from our feeders.
 I don't think the birds have figured out that these are food yet..
If nothing else, it looks really pretty. ;)
Monday, January 31, 2011

 I set up a couple tents, some stuffed animals, and some pillows; and the kids came to school dressed in their PJ's, with their favorite stuffed animal, and maybe a pillow or blanket.
 We talked a lot, and read a ton of books, about hibernation. My favorite is Bear Snores On. I love books that rhyme, and that one is masterfully done. We also read: Time to Sleep; Sleep, Black Bear, Sleep, and we looked at books like Animals that Hibernate and Animals in Winter.
 We also watched a live video of hibernating bears online. The video was from the North American Bear Center. It wasn't exactly a thrill a minute (it's a pretty dark picture), but when you did get a glimpse of the bears it was neat, and I think it help to solidify the idea of bears hibernating.
Unfortunately my T/TH class got the raw end of the deal on this. The bears hardly budged the entire class. All they could see was a big brown mass. The MWF class got a number of great views of the bears though so I think the other guys were just unlucky. I'll try to put it on for them again sometime.
Anyway, It was a lot of fun. I will definitely do it again next year. :)

Thursday, November 4, 2010
This was a great activity that I wanted to share. I did it for Halloween, but you could also do it for Thanksgiving.
I got a large carving pumpkin and placed it in my sensory bin (outside - this gets messy). First, I asked the children what was inside the pumpkin (teasing them that it was full of kitty cats or bunnies, etc.). Next, I cut open the pumpkin and we all removed the insides and placed it in the sensory table for them to explore. We talked about how the pumpkin insides felt - wet, slimy, slippery etc. and worked together to separate the seeds from the stringy goop. (I reserved a few seeds for us to plant in the garden.) I explained to the children that we were going to cook the pumpkin seeds, and filled up a pot to boil water on the stove. We boiled our seeds for 10 minutes on high heat. Afterward, the children helped me stir butter into the seeds, spread them on the pan, and sprinkle salt over them. We placed the seeds into the oven (275 degrees) and cooked them until browned.
Later we took the reserved seeds and insides, and planted them in the garden in the backyard. We'll see if they grow. :)
The great thing about this activity is that it was like a million lessons in one:
- We predicted what was inside the pumpkin
- Used our vocabulary to describe how the pumpkins insides felt
- Worked our fine motor skills removing the seeds from the stringy insides
- Discussed how water boils (I asked them questions like: "how do we boil water? and "What does water look like when it's boiling?" I also showed them what the water looked like when it was boiling)
- We talked about stove and oven safety
- Learned about how butter melts when heated up
- Counted the number of minutes to boil the water and cook the seeds
- Saw how the seeds changed when cooked
- Planted the seeds in the garden.
***And when we were done with the pumpkin, I got a bunch of tees and we beat them into the pumpkin using plastic hammers - a good gross motor activity. ***
Overall, this was an awesome activity. My only complaint is that the seeds took too long to cook, and they weren't finished before the children went home. My oven is a little strange (gas) and sometimes recipes take longer than they should to cook in it. Next time, I will have to cook them at a higher heat.
Tuesday, June 29, 2010
We are currently learning all about plants, and I wanted to help the children learn about seeds in a way that was fun and hands-on. This was definitely it.
I purchased some fruits and vegetables at the store: tomatoes, green beans, lemons, oranges, cucumbers, and grapes. After talking about how plants grow from seeds, I sat the children down at the table and told them that we would be looking inside all of the fruits and vegetables to see what kinds, and how many, seeds they had. One at a time, I showed them a fruit or vegetable and had them take turns guessing how many seeds were inside it. Then, I cut it open, and we counted the number of seeds to see who was the closest..... then we ate them.
The children had a ton of fun guessing the number of seeds and eating the yummy fruits and vegetables. Not only was it a fun way to learn about seeds, but we got to make predictions and practice counting as well. :)
***A great book that we read to go along with this activity was "A fruit is a Suitcase for Seeds by Jean Richards."***
This is an activity we did to learn to distinguish between living and non-living things.
First, at circle time we talked about the traits of living things: They need air, water, food, and they grow (they also reproduce, but I wasn't sure I wanted to get into this discussion with the kids so I mainly stuck to the other 4. :) ) Next, I held up pre-cut images (with the pictures facing away from the children) and the children each took turns choosing an image, telling the class whether it was living or non-living and placing it on our board under the correct grouping.
The children did surprisingly well distinguishing between the two.
Next, we looked at 3 flowers that I planted, and three rocks I placed in small dishes. I told the children the one flower and rock would get plenty of sun and water, another rock and flower would get no water, and the last flower and rock would get no sunlight. Then, I asked the children to predict what would happen. Now this is where it gets interesting... Most of the children knew that with the proper light and water the flower would grow, and without it the flower would die. However, they thought the same thing would happen to the rocks. Even after I asked them if the rocks were living things and they said "no."
We have been watching these silly flowers and rocks for a week now, and I have to say that those are some pretty darn resilient flowers. They look way too good! I'm hoping they start to wilt a little soon or my lesson may be kaput. :P As soon as I see them start to noticeably wilt, we'll discuss our findings, and I'll have the children plant them outside.
Here is a picture of our science table with the flowers and rocks. The big red thing is the construction paper shielding the one flower from the sun. The other piece of paper is covering the rock.

This is such a cool activity, but I have 2 issues with it:
1. I tried to squeeze this all into one day and it really should have been two. It was a bit too much all at once.
and
2. I'm afraid that by the time these flowers actually start to wilt the children will have completely forgotten why we had them there in the first place. We'll see....
Saturday, April 24, 2010
This is a super simple, but fun project, that works really well with a mixed age group like mine. It's simple enough for even toddlers to do, but creating the collage is is an enjoyable challenge for even the oldest preschoolers.
I did this project as part of a study of nature for Earth Day. I gave each child a basket, and asked them to collect natural items found outdoors (i.e. leaves, flowers, pine needles, etc.). I hung contact paper* on the easels outside, and invited the children to stick the items they collected to the paper any way they wanted. The results were beautiful!
*Contact paper is a paper used normally to line the inside of cabinets. It has a printed side and a sticky side. This can be an especially useful material when attempting to do collages with very young children. You can find it in any home improvement store.
