Wednesday, August 17, 2011
Well, I'll admit, it's been a while. I have been running around like a crazy person this summer and haven't had much time to blog. Now that the summer is coming to a close, I wanted to write about some of the fun things we did this summer.
This summer, we learned all about nature beginning with one of my favorite subjects: BUGS!
We learned all about these creepy crawlies and what makes them tick. We practiced our drawing skills by drawing pictures of bugs, tried (unsuccessfully) to create an ant farm, and made our own awesome diagrams of the inner workings of an ant mound.
Prior to working on the diagram, I showed the children pictures of the inside of an ant mound and how the different chambers served various functions. I kept it pretty simple: Worker aunts are at the top of the nest bringing in food for the queen and rest of the colony. Just below the workers live the larvae. The queen is in a chamber in the center of the nest, and food storage is at the bottom.
Here is what we did...
Materials:
- Peel and stick shelf liner paper
- Construction paper
- Crayons or markers
I took various colored pieces of construction paper and pre-cut them
 into various sizes of ovals and tunnels. I taped the sticky paper up on the wall with the sticky side out, and organized the children into teams of two. Then, I invited them to stick the construction paper tunnels and ovals onto the paper connecting the tunnels and chambers (i.e. ovals) any way they wished. Finally, we drew in pictures of aunts, larvae, the queen, and food stores. I think they turned out great!


Friday, February 25, 2011
 The idea here is that you are making simple bird feeders, while working on the children's fine motor skills by having them thread Cheerios onto yarn. This sounds simple, but like everything involving children... it is not as simple as it seems. :)
Here's what you'll need:
- Colorful yarn
- Cheerios
- Small bells
- Glue
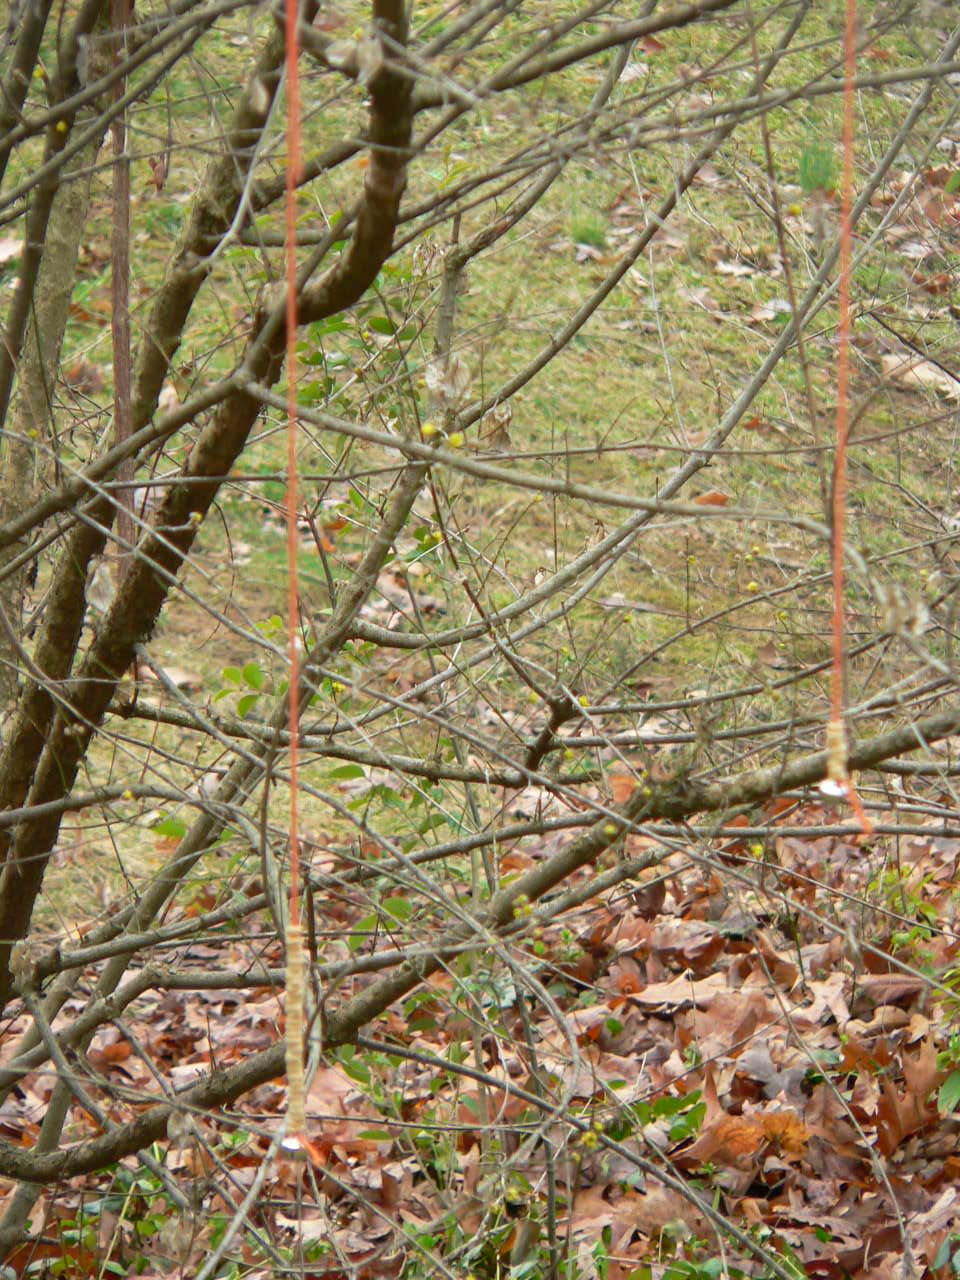
Once you have everything prepared, the actual activity is super easy. I took the kids outside so I could leave it to the squirrels and birds to clean up any mess. I placed bowls of Cheerios in the center of the tables, and let them thread as many as they wanted onto the string. Once finished, we hung them on a tree outside our classroom window so we could see if any birds ate from our feeders.
 I don't think the birds have figured out that these are food yet..
If nothing else, it looks really pretty. ;)
Monday, January 31, 2011

 I set up a couple tents, some stuffed animals, and some pillows; and the kids came to school dressed in their PJ's, with their favorite stuffed animal, and maybe a pillow or blanket.
 We talked a lot, and read a ton of books, about hibernation. My favorite is Bear Snores On. I love books that rhyme, and that one is masterfully done. We also read: Time to Sleep; Sleep, Black Bear, Sleep, and we looked at books like Animals that Hibernate and Animals in Winter.
 We also watched a live video of hibernating bears online. The video was from the North American Bear Center. It wasn't exactly a thrill a minute (it's a pretty dark picture), but when you did get a glimpse of the bears it was neat, and I think it help to solidify the idea of bears hibernating.
Unfortunately my T/TH class got the raw end of the deal on this. The bears hardly budged the entire class. All they could see was a big brown mass. The MWF class got a number of great views of the bears though so I think the other guys were just unlucky. I'll try to put it on for them again sometime.
Anyway, It was a lot of fun. I will definitely do it again next year. :)

Friday, January 21, 2011
This is a project we did as part of a unit on winter and polar animals. To create the template, I took the picture I found of a teddy bear outline, (http://twistynoodle.com) inserted it into word, and wrote "My polar bear's name is.." underneath it.
For the class... I gave the children just the glue and the template to start off, and I showed them how to cover the entire inside of the template with the glue. Next, we used medium sized cotton balls to stick to the glue. Once most of them were finished, I talked to the group about what the bear was missing. With a little encouragement they figured out that he needed eyes, a nose, and a mouth. I then set out some plates with various materials on them: cut pieces of string, buttons, pom poms, and googly eyes, and let the kids go for it.
I have these displayed in the room right now, and they are pretty hysterical. I have some with 20 eyes on them, and others with nothing but buttons.

The children got pretty creative with the names they gave their bears as well. We had our fancy bears: Gabriella and Eala. Our islander bears: Tiki and Jaga. Our country music bear: Hank-O-Mise. Our traditional bear: Snowflake. Our big bear: Tiny. And last but not least the undefinable (and my personal favorite): Chicken. :)
Like many of my projects, I adapted this idea from one I got online. It is quite simple actually... You give the children pasta wheels, and have them glue them together with regular school glue, give it a day or two to dry, then paint it with white paint and silver glitter. Once they're dry, you can tie a string on one end to make them into ornaments. (I didn't do this since it was past x-mas time when we did it).
 (These really weren't this shinny... it's just my flash.)
- Do this on wax paper. You don't want to have to pick them up until they are dry, and once dry they will just stick to anything else.
- School glue really does work, but try to make sure the children glue them in a bunch, not a line. I had some that did really neat designs pasting the wheels end to end, but they fell apart when I tried to remove them from the wax paper. An idea may be to draw little circles on the wax paper and ask the children to fill them in. I didn't do that.. it's just a thought.
- I used the small pasta wheels because I thought it would be a good fine motor activity for them. It was, but I do think they would have looked much grander if we had used the larger ones. I also think they probably would have been easier to paint.
All in all... it was a cute 2 day project the kids really enjoyed.
Tuesday, January 18, 2011
Okay... So this started out with the idea being that we would split up into teams, make walls with the large cardboard blocks, roll toilet paper into balls, and have a snowball fight. Instead it was more like a tearing, throwing, rolling, jumping, diving, super-crazy free for all.
And it was sooooo much fun!!
I had each child bring in one roll of toilet paper and we went crazy ripping and trowing it all around the room. The kids had a ball, and so did I, but there was one problem... lint. Holy &*^%) the lint!! It was so thick that I had to make the kids go outside to let it settle because it was starting to make us cough. Then, cleaning it up was ridiculous. I basically vacuumed the entire room.
I realized after the fact where I went wrong. You see, with my first class it wasn't so bad, but a lot of those parents had forgotten to bring in the TP, and I used some cheapo toilet paper I had on hand. I did, however, remember to send and email out to parents the night before my second class to remind them to bring a roll for their child so they all remembered. Well... I guess I have some families with sensitive tushies because I got some really high-class TP. And as you may know, the softer the toilet paper the more lint it creates. So my advice to anyone who would like to do this with their class is to get the cheapest, roughest, just short of sandpaper toilet paper you can find and go nuts! :)
This is such a simple idea, but it touches on so many important concepts: fine motor skills, ordering by size, and producing representational art.
For this activity I made white playdoh. (To make white play-doh, just follow the Homemade Play-doh Recipe and omit the food coloring). I also used some red play-doh that was ready to be replaced.
First, we talked about how a snowman looked. I drew a picture on the white board showing how a snow man was made up of three balls that got progesivly smaller as they were stacked on top of each other. Then, I showed (i.e. reminded :) ) the children how to roll play-doh into a ball by rolling it on the table. One at a time, we rolled the play-doh into 3 balls (small, medium, and large), and stacked them up largest to smallest. Next, we rolled the red play-doh into a snake, and placed it around the snowman's neck like a scarf. Finally, we added pipe cleaners for arms, and drew the faces on with marker. Here's one that a little girl in my class did. So cute!! Tip: Place them on wax paper and give them a couple days to dry. They harden nicely but are very fragile.
This was an activity we did as part of a unit on safety and community helpers. This activity was adapted from an one I found online. The online project called for painting a fire scene with the shadow of a house in front. I had two problems with this: 1. I would have to make the house for it to look right since the kids are too young to cut out windows and such, and 2. it seemed a bit morbid to me. So I figured out a way to make it less morbid, but also create a project the would help the children learn how the things we see are made out of shapes.
First, I had the children paint a white piece of paper with orange yellow and red paint. I told the kids to really glob the paint on. Then we placed saran wrap over the picture and rubbed it around to mix the colors, then quickly pulled it off in an upward motion to create the look of fire.
Next, I created some shapes that the children could use to make a shadow form of a fire truck. I made circles (wheels), squares (the cab), a large rectangle (truck), and a long rectangle (ladder). Then I showed the children how they could use these shapes to make the image of a fire truck, and let them past it on their paper. I think they turned out great!!
 I know, I know.. I'm a creative genius. :P
Saturday, January 8, 2011
This is an activity that's super-fun, but is also really good for number recognition.
First, I cut up blank index cards and numbered them 1-5. These were the "tickets." I made enough that every child in my class could have 5 tickets, but my class is small so this worked. (With a bigger class, it might be best to hand each child only a couple of tickets and rotate). Then I wrote the numbers 1-5 on full index cards.
For the activity, I told the children that we would be riding the number train, and handed out tickets. I held up my large ticket for number 1, and said "Boarding train number one. " Then I collected the children's tickets while doing the whole train conductor thing - saying "all aboard" and stuff like that. The children made a train by holding onto the shoulders of the person in front of them. I was the engine, and the children were the cars. We went once around the room making train noises, then stopped back at the "station" (i.e. blocks center) where the passengers on train #1 got off. This process was repeated over and over until all the trains (1-5) were boarded.
It was a ton of fun and the children wanted to do it over and over again.
Thursday, November 4, 2010
This was a great activity that I wanted to share. I did it for Halloween, but you could also do it for Thanksgiving.
I got a large carving pumpkin and placed it in my sensory bin (outside - this gets messy). First, I asked the children what was inside the pumpkin (teasing them that it was full of kitty cats or bunnies, etc.). Next, I cut open the pumpkin and we all removed the insides and placed it in the sensory table for them to explore. We talked about how the pumpkin insides felt - wet, slimy, slippery etc. and worked together to separate the seeds from the stringy goop. (I reserved a few seeds for us to plant in the garden.) I explained to the children that we were going to cook the pumpkin seeds, and filled up a pot to boil water on the stove. We boiled our seeds for 10 minutes on high heat. Afterward, the children helped me stir butter into the seeds, spread them on the pan, and sprinkle salt over them. We placed the seeds into the oven (275 degrees) and cooked them until browned.
Later we took the reserved seeds and insides, and planted them in the garden in the backyard. We'll see if they grow. :)
The great thing about this activity is that it was like a million lessons in one:
- We predicted what was inside the pumpkin
- Used our vocabulary to describe how the pumpkins insides felt
- Worked our fine motor skills removing the seeds from the stringy insides
- Discussed how water boils (I asked them questions like: "how do we boil water? and "What does water look like when it's boiling?" I also showed them what the water looked like when it was boiling)
- We talked about stove and oven safety
- Learned about how butter melts when heated up
- Counted the number of minutes to boil the water and cook the seeds
- Saw how the seeds changed when cooked
- Planted the seeds in the garden.
***And when we were done with the pumpkin, I got a bunch of tees and we beat them into the pumpkin using plastic hammers - a good gross motor activity. ***
Overall, this was an awesome activity. My only complaint is that the seeds took too long to cook, and they weren't finished before the children went home. My oven is a little strange (gas) and sometimes recipes take longer than they should to cook in it. Next time, I will have to cook them at a higher heat.
Thursday, August 5, 2010
This was sooo much fun! It's messy though. Remember to put paint shirts on the kids, and be prepared with paper towels and spray cleaner.
First you have to make the ice cubes. Here's what you'll need:
- Ice cube trays
- Popsicle sticks (you can get small ones or break them in half)
- Aluminum foil
- Liquid watercolors (This is the key. Using food coloring does not turn out nearly so bright and colorful. I have only found these at Discount School Supply.)
Here's how to make them:
- Take the ice cube tray and fill each section 3/4 of the way full with the liquid watercolors. I used red, yellow, and blue so the children could see how those colors blend to make secondary colors. One tray will go a long way. I used one for about 10 kids, and I had a good bit left over.
- Next fill each section the rest of the way with water.*
- Place the foil over the entire tray pressing it down so you can see the divisions between the sections.
- Finally, push a popsicle stick through the foil in each section (you may want to pierce the foil with a knife first). The foil will hold the sticks up straight until the water freezes.
- Let it freeze overnight.
The activity:
Before you begin, explain to the children that these are paints and must not be eaten. They're non-toxic, but do temporarily stain the skin. Twist the tray to release the cubes, and place them in a small container in the middle of the table for the children to share. These totally bleed through paper, but are pretty easy to clean off of hard surfaces. Clothes, however, well that remains to be seen. :P
Here are a few of the pictures. The lighting isn't the best. They are even prettier in person!

* Be careful to leave a little space at the top, or you'll have nothing but brown ice cubes. ;)
This was a wonderful idea, (stolen from Sid the Science Kid) poorly executed. This is definitely one of those activities where YOU can learn from my mistakes. Here's what I did....
The children and I put a bunch of fruit (i.e. grapes and strawberries) in a large Tupperware, filled it with water, covered it, and placed it in the freezer. We talked about what we thought would happen to the water and fruit. Some of the kids said they would turn into popsicles. I thought that was cute. :) The following class, I took the container out of the fridge and dumped the, now, big block of ice into a large bin. Then, the children felt the ice, and gave me ideas of how we could get to the fruit inside. I got ideas like: put it in the pantry, put it in the closet, melt it with cold water, melt it with hot water, etc.
Good so far, right? Here's where things start to fall apart.
We decide to melt it with hot water. So I gave each child a cup of water to pour over top of the ice, and I had a large pitcher. We counted one... two.. three.. and poured. Oops! The ice melted, but not enough to release any fruit. I had to go back to the sink (all the way in the kitchen) about 5 times. Meanwhile, the children were getting bored. Finally, all the ice melted, and we got the fruit. The grapes were wonderful, but the strawberries were mushy - I probably should have anticipated that. I also probably should have anticipated that getting a huge bin full of water out of the room might be difficult. I picked it up, one side gave way and - SPLASH - it went all over the floor. I raced to the sink to dump what was left, spilling much more water in the process, and proceeded to race around the room trying to clean up all of the water before someone fell. In the end, the kids really enjoyed it. I, on the other hand, did not.
However, I can learn from my own mistakes!!!
I did a few things differently with my other class. First of all, I did it outside - MUCH BETTER! Second, I was prepared with a couple pitchers. The strawberries still stunk though. Next time, I will only use grapes.
Tuesday, June 29, 2010
We are currently learning all about plants, and I wanted to help the children learn about seeds in a way that was fun and hands-on. This was definitely it.
I purchased some fruits and vegetables at the store: tomatoes, green beans, lemons, oranges, cucumbers, and grapes. After talking about how plants grow from seeds, I sat the children down at the table and told them that we would be looking inside all of the fruits and vegetables to see what kinds, and how many, seeds they had. One at a time, I showed them a fruit or vegetable and had them take turns guessing how many seeds were inside it. Then, I cut it open, and we counted the number of seeds to see who was the closest..... then we ate them.
The children had a ton of fun guessing the number of seeds and eating the yummy fruits and vegetables. Not only was it a fun way to learn about seeds, but we got to make predictions and practice counting as well. :)
***A great book that we read to go along with this activity was "A fruit is a Suitcase for Seeds by Jean Richards."***
This is an activity we did to learn to distinguish between living and non-living things.
First, at circle time we talked about the traits of living things: They need air, water, food, and they grow (they also reproduce, but I wasn't sure I wanted to get into this discussion with the kids so I mainly stuck to the other 4. :) ) Next, I held up pre-cut images (with the pictures facing away from the children) and the children each took turns choosing an image, telling the class whether it was living or non-living and placing it on our board under the correct grouping.
The children did surprisingly well distinguishing between the two.
Next, we looked at 3 flowers that I planted, and three rocks I placed in small dishes. I told the children the one flower and rock would get plenty of sun and water, another rock and flower would get no water, and the last flower and rock would get no sunlight. Then, I asked the children to predict what would happen. Now this is where it gets interesting... Most of the children knew that with the proper light and water the flower would grow, and without it the flower would die. However, they thought the same thing would happen to the rocks. Even after I asked them if the rocks were living things and they said "no."
We have been watching these silly flowers and rocks for a week now, and I have to say that those are some pretty darn resilient flowers. They look way too good! I'm hoping they start to wilt a little soon or my lesson may be kaput. :P As soon as I see them start to noticeably wilt, we'll discuss our findings, and I'll have the children plant them outside.
Here is a picture of our science table with the flowers and rocks. The big red thing is the construction paper shielding the one flower from the sun. The other piece of paper is covering the rock.

This is such a cool activity, but I have 2 issues with it:
1. I tried to squeeze this all into one day and it really should have been two. It was a bit too much all at once.
and
2. I'm afraid that by the time these flowers actually start to wilt the children will have completely forgotten why we had them there in the first place. We'll see....
This is a neat activity we do pretty-much every day for circle. What makes it so great is that it accomplishes so much in such and easy, fun way.
Here is what you do:
- Make some flash cards with simple action words written on them in bold print. (Large index cards should be fine). Some ideas for words are: jog, jump, hop, wave, twist, freeze, spin, kick, wiggle, tip-toe, crawl, and clap.
- Have your students stand up during circle, making sure they have a bit of room so they aren't hitting each other.
- You hold up the first word and say the word ( jump). Then, count together from 1-10 as you perform that action.
- Next, you hold up another word and say the word (spin). Then, count together from 10-20 as you perform that action.
- You continue holding up a new card and saying that word every tenth place until you count to 50. The goal is to eventually work your way up to 100, and be able to hold up the cards with out saying the words. Right now we're counting to 50, but I hope we will eventually work our way up to 100.
This activity is great for three reasons:
- It helps the children learn the sequence of numbers from 1-50 and eventually 1-100. Of course, this is rote knowledge, but it is a necessary step in learning how to count.
- In the morning some children are pumped and need to get their energy out, and others are still half asleep. This exercise wakes up the sleepy ones, and mellows the hyped up ones.
- By using the word cards you are helping the children connect the letters with the words, the words with actions, and eventually (hopefully) teaching them some sight words.
Sunday, April 25, 2010
One thing I've noticed through all of my reading is that there is very little out there on classroom management for preschool teachers. So I thought I would post on here some of the interesting things I've used to help the children learn to get along with each other and function in a classroom setting. One of the most important and trying issues a preschool teacher must deal with is hitting. Though it is upsetting for us, as adults, to see our children hit or get hit, it is really normal for this age group. Young children just don't know how to express themselves verbally and hitting, pushing, and yelling at one another is often a result of this. It is our job as teachers and parents to help them learn alternatives to these behaviors. Am I an expert at this? Absolutely not, but I am learning. Here is one activity I've done with the children that I thought was really great:
We began by reading the book "Hands Are Not for Hitting" by Martine Agassi. In this book, the author describes what hands are for like painting, playing, sharing, caring, hugging etc. After we read the book, we threw out some ideas of what hands are for, then the children moved onto centers. As they worked, I pulled them out one by one to make hand prints on pieces of construction paper. The following  class, I asked them to tell me what hands are for, and wrote their responses beneath their hand prints. Then I hung them in the room. Now when a child hits I will often say to the whole class.. "Hands are not for..?" and they will say "Hitting!". The I will say, "What are hands for?" and they will respond with things like playing or painting. Here is what the project looked like when finished.
Saturday, April 24, 2010
This is a super simple, but fun project, that works really well with a mixed age group like mine. It's simple enough for even toddlers to do, but creating the collage is is an enjoyable challenge for even the oldest preschoolers.
I did this project as part of a study of nature for Earth Day. I gave each child a basket, and asked them to collect natural items found outdoors (i.e. leaves, flowers, pine needles, etc.). I hung contact paper* on the easels outside, and invited the children to stick the items they collected to the paper any way they wanted. The results were beautiful!
*Contact paper is a paper used normally to line the inside of cabinets. It has a printed side and a sticky side. This can be an especially useful material when attempting to do collages with very young children. You can find it in any home improvement store.
Saturday, January 16, 2010
I've had a lot of fun doing this with my class, and the children have really gotten into it. The best part about it is that it is so easy to adapt to various age levels. All you need is a box - think large shoe box - with a hole in the side big enough for children to easily put their hands into and take things out of, but not so big that they can see into it. That's the whole super-secret mystery part. ;)
There are three ways you can use the super-secret mystery box:
1. This first activity is good for children ages 2 to 3 who are still working on basic verbal skills. I incorporate the letter of the week into the activity, but it is only in an effort to expose the children to letters and their sounds. At this age, the focus is really on getting them to talk, talk, talk. :) The children simply reach into the box, and name the item they take out. This week I placed a baby doll, book, bear, ball, and bananas (plastic of course) in the mystery box and the children took turns taking the items out, naming them and placing them in the "B" box. The "B" box will stay out until we do the letter "C" next week. However, the likelihood that the items will actually remain in the box that long is not too good.
2. For older preschoolers, you can place one item in the box, and have the children take turns feeling it and giving a one word description of it (long, square, rough etc.). Then ask the students to guess what it is. This is a great way to get them to think about the properties of things. The difficulty with this activity is finding an object that lends itself to a lot of descriptions. With a large class, it would be best to let all the children touch the item, then call on a few to describe it. You could also give the children a chance to make multiple guesses as to what it is, and see who's right.
3. Another way to challenge your older preschoolers is to place items in the box and ask them to simply guess what they are - only by touch. This might be a good follow-up to the 2nd activity, or you can slowly work your way up to more and more difficult items over time as the children get better at it. This activity is fun in that each child can be given a different item to feel.To start out, you could set out simple objects that might be in the box for the children to see, and have the children take turns guess which one they find in the box. Then, you can place more and more complex objects in the box over time to challenge them. My son loved this activity. He couldn't get enough of it, and I thought it was really fun too. My husband and I got so into it, we were trying to trick each other with some really tough choices, and were even guessing the letters on Sebastian's wood blocks. I totally won! ;)
Tuesday, January 5, 2010
I'm happy to say that we had our first day of school today, and it went really well! I am so lucky to have such a neat group of kids!
This is the activity we did for circle time:
This activity was based on the book "Oh My Baby Little One" by Kathy Appelt (A wonderful book for the first day of school).
On the bulletin board I had written a line from the book that said "This love will always be with you" and placed cut out hearts all around the classroom with excerpts from the book written on them for the children to find. After we read the book, I helped the children search the classroom for the hearts. As each heart was found, I read the words on it to the children, and placed it on the bulletin board. This made for a really sweet display once all the hearts were assembled around the quote on the board.
Although I think this is a cute first day activity, the children were (as I expected) too excited with all the new toys to really get into it. Not to mention, being a class of 2 -year-olds, it was their first such experience. I think it was a fun first activity for them, but an older class would probably really get into it.
Monday, December 7, 2009
I used to teach art so I do a lot of art projects with my son. Here are a couple projects we did recently using unusual items for painting.
String Painting
This is one I'd never done before. Sebastian wanted to play with some of the string we got at the store, and I was going to try to teach him to braid and tie knots, but then he said he wanted to paint so I thought to combine the two. I simply squirted some paint on a Styrofoam tray, and placed one piece of string in each color. We used a plastic fork to push the strings into the paint because Sebastian didn't want to get his hands dirty (don't even get me started on that :P). I would show him one way to paint with the string, and give him a little time to try what I showed him before introducing another method.
We tried:dragging the string, laying it down carefully in straight lines, lightly tapping it on the paper, and running it carefully along the paper in curved lines. I think it turned out great! And we had a lot of fun!
Knife and Fork Painting
Before I even begin... yes I'm talking about PLASTIC forks and knives. Jeez, what kind of mother do you think I am. ;)
This project actually came out of the string painting project. Sebastian wiped the fork we were using on the paper, and I was curious to see what he could do with it. I introduced the knife later after I realized what a cool idea this was. The great part about this project is watching them explore all the different ways they can make marks using the fork and knife. Sebastian really experimented with the utensils - especially the knife. He spread the paint like butter, scratched the paint with the serrated edge, sliced at the paint.. everything. The fork couldn't hold much paint but made great scratch marks on the paper and cool dots. I'm going to try thickening the paint next time and see how that works. I'll let you know....
Here is his painting. I love it!!
