Sunday, July 1, 2012
Hi everyone,
Thank you so much for your support over the past several years! Since I have closed my school, I will not be posting on Preschool Mommy anymore, but I'm starting a new blog Musings of an Imperfect Mom. It will contain more projects and useful information, as well as funny stories about my kids and just my general take on parenting. I hope you will enjoy my new blog, and continue to lend your support to my work.
Sincerely,
Courtney
Wednesday, August 17, 2011
Well, I'll admit, it's been a while. I have been running around like a crazy person this summer and haven't had much time to blog. Now that the summer is coming to a close, I wanted to write about some of the fun things we did this summer.
This summer, we learned all about nature beginning with one of my favorite subjects: BUGS!
We learned all about these creepy crawlies and what makes them tick. We practiced our drawing skills by drawing pictures of bugs, tried (unsuccessfully) to create an ant farm, and made our own awesome diagrams of the inner workings of an ant mound.
Prior to working on the diagram, I showed the children pictures of the inside of an ant mound and how the different chambers served various functions. I kept it pretty simple: Worker aunts are at the top of the nest bringing in food for the queen and rest of the colony. Just below the workers live the larvae. The queen is in a chamber in the center of the nest, and food storage is at the bottom.
Here is what we did...
Materials:
- Peel and stick shelf liner paper
- Construction paper
- Crayons or markers
I took various colored pieces of construction paper and pre-cut them
 into various sizes of ovals and tunnels. I taped the sticky paper up on the wall with the sticky side out, and organized the children into teams of two. Then, I invited them to stick the construction paper tunnels and ovals onto the paper connecting the tunnels and chambers (i.e. ovals) any way they wished. Finally, we drew in pictures of aunts, larvae, the queen, and food stores. I think they turned out great!


Wednesday, March 2, 2011
To kick off our space and science theme, we made space bottles. It's sooo simple and so cute.
Here's what you'll need:
- Mini (12 oz) soda bottles
- Faceted colored beads of various sizes
- Silver glitter
- Blue food coloring (optional)
- Corn syrup (this is what gives it the floating effect)
First, I removed the labels from the bottles, and used Goo Gone (the greatest invention for moms next to the magic eraser) to remove the sticky residue. Next, I filled them about halfway with water, and closed the top for the children to finish up the following day.
I placed out a few bowls of multi-colored beads, and allowed the children to place however many they wanted into the bottle. Next, I helped them pour the glitter in the bottle. I found that if I let them do the food coloring, they made it too dark so I asked them if they wanted one drop or two of food coloring and did it for them. Finally, I placed the corn syrup over the hole and they squeezed it into the bottle until it was full. They put the tops back on and shook the bottles like crazy to mix everything. After class, I hot glued the tops on because I felt it was too dangerous to do with the children around, especially with my 1970's glue gun.

I did help the children more with this project than I usually do. I'm a big proponent of process over product, and although I had the children do as much as possible, I did have to help a lot or they would not have turned out right. Like I said, normally I wouldn't care about it "turning out right" but this was less about artistic process, and more about the children making their sensory bottles that, I hope, they will be able to enjoy for a very long time.
Anyway, I think they turned out great, and it was a really fun way to kick off our space theme!
Okay... so remember that comment about sharing my utter failures. Well here's one you can definitely sink your teeth into.
This project started out as your typical grain and seed collage. I put together a mixture of grans and bird seed I got at the store, and had the children spread glue on a paper plate any way they wanted. Then they sprinkled the seeds onto the plate, and dumped the excess off so the seeds stuck to the glue creating a design on the plate.
Here's the thing... this was cute, but kind of blah.
So I had this inspiration! I thought it would look really neat if the children painted their collages. The following class, I gave the children a mixture of glue and paint in red, blue, and yellow. Well, as is often the case, the children just didn't follow my idea of what they would do. They mixed the paints, and spread it on very thickly creating what I have dubbed... "Vomit on a plate."
I figured it wouldn't be a very good idea to post an image of them for the sake of anyone who is unfortunate enough to be eating as they read this. ;)
In closing... don't try this one at home kids.
Friday, February 25, 2011
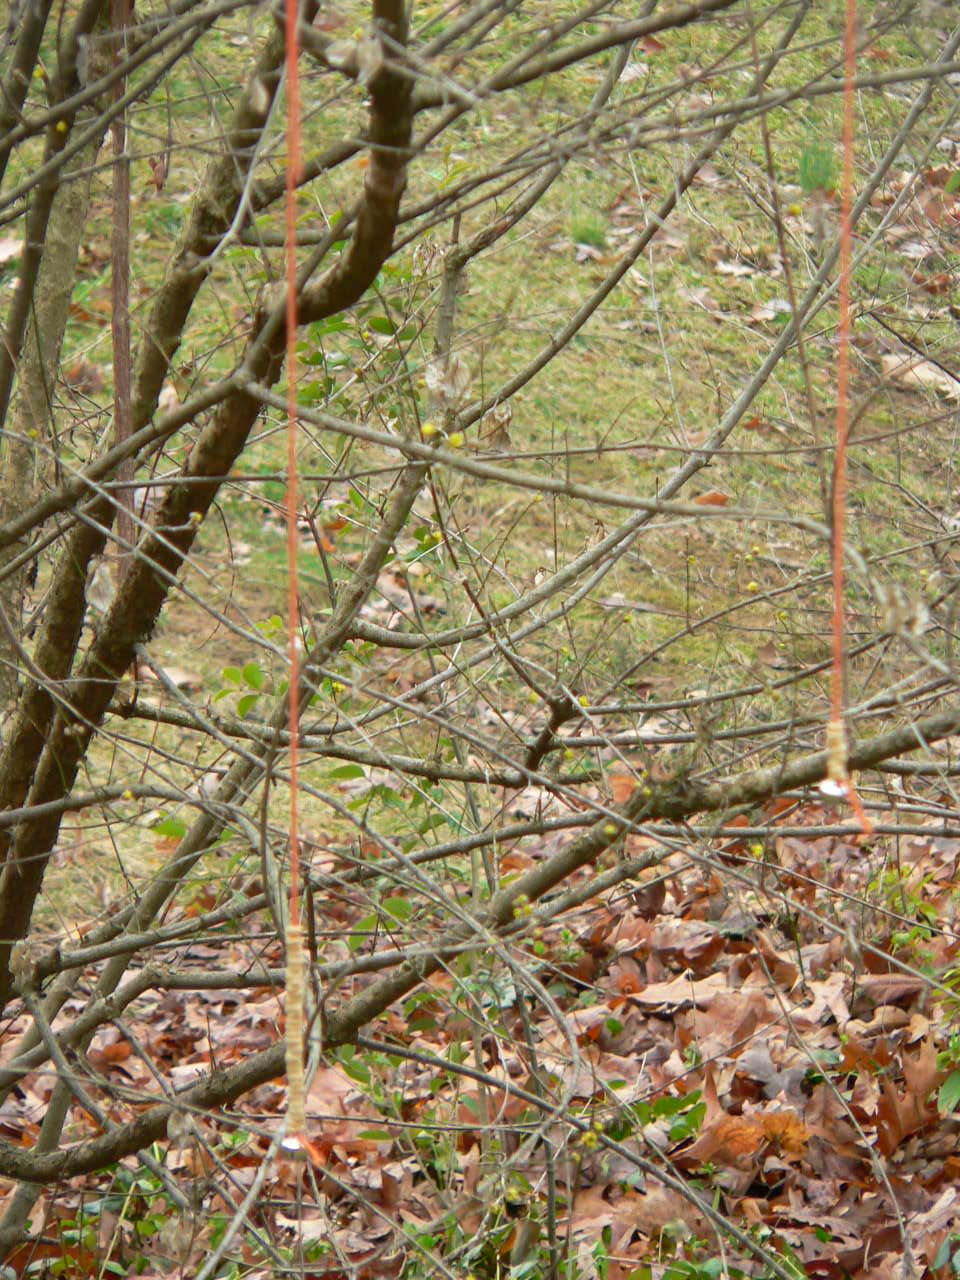 The idea here is that you are making simple bird feeders, while working on the children's fine motor skills by having them thread Cheerios onto yarn. This sounds simple, but like everything involving children... it is not as simple as it seems. :)
Here's what you'll need:
- Colorful yarn
- Cheerios
- Small bells
- Glue
Once you have everything prepared, the actual activity is super easy. I took the kids outside so I could leave it to the squirrels and birds to clean up any mess. I placed bowls of Cheerios in the center of the tables, and let them thread as many as they wanted onto the string. Once finished, we hung them on a tree outside our classroom window so we could see if any birds ate from our feeders.
 I don't think the birds have figured out that these are food yet..
If nothing else, it looks really pretty. ;)
Sunday, February 13, 2011
This is a project to help improve the children's motor skills (cutting , folding , gluing, and stapling), but even more so, it is meant as a literacy activity. Through this project the children created their own books with pictures, and told stories to accompany the images. This is a tall order for three year olds, but the children proved once again that they are capable of doing amazing things with just a little bit of scaffolding.
My kids are still in the early stages of representational drawing, and I really wanted to work on their cutting skills, so I made this animal sheet. It has a number of animals for them to choose from, they just have to follow the lines with the scissors to cut them out. I made it this way because they have a tendency to snip around the edge of the page, and I wanted them to start cutting through the paper.
Click here to download the animal cutting sheet
All of the images were downloaded for free online.*
Next, I helped the children fold two pices of paper and staple them on the fold to create a book. They pasted the cut-out images, one to each page, in the book. I placed wax paper between the pages to keep them from sticking together. Once the glue was dried, the children could color the images.
Finally, I asked the children to name their books and tell me stories based on the pictures that were inside. I was very impressed with their stories, and wrote them on the inside of their books. Here is an example of one of the the books.
The child wrote:
Cow is moo.
Duck is quacking, and dog is ruffing.
And the elephant is swinging his trunk, and the seal is going in the water. 
There is another story one of the children wrote:
My giraffe reaches out his neck and get leaves,
and my seal swims.
My snake does climb to trees and he goes like this on the ground (acted out :) )
Doggie licks and we pet him.
My turtle's my friend too.
I had another one who sang all of Old Mac Donald, and another who named her snake lion and her gorilla princess, and said they liked to play games on the computer. :)
All of them were original and soo cute. This activity is definitely a keeper.
One caveat....
I gave myself 2 days for this project, but it took much longer. I still haven't gotten all of the children to dictate stories to go along with their books, but most have. I would reccomend that you give youself a couple weeks to work on this while doing smaller daily activies.
*Web sites
- http://animalspiictures.blogspot.com/2010/08/animal-coloring-pages.html
- http://www.coloringpagestube.com/
- http://www.craftsandcoloringpages.com/free-printable-coloring/
- http://www.911coloringpagestoprint.com/
- http://www.coloringpageskingdom.co
- http://animalspiictures.blogspot.com/2010/08/animal-coloring-pages.html
- http://www.kidsandcolors.com/coloring-page-44.html
- http://thecoloringspot.com/animals/animals-set-9.html
- http://www.eprintablecoloringpages.com
- http://www.kidsandcolors.com/
- http://www.tiptopglobe.com/f
- http://www.coloringpages1001.com/coloring-pages/giraffe/
Monday, January 31, 2011

 I set up a couple tents, some stuffed animals, and some pillows; and the kids came to school dressed in their PJ's, with their favorite stuffed animal, and maybe a pillow or blanket.
 We talked a lot, and read a ton of books, about hibernation. My favorite is Bear Snores On. I love books that rhyme, and that one is masterfully done. We also read: Time to Sleep; Sleep, Black Bear, Sleep, and we looked at books like Animals that Hibernate and Animals in Winter.
 We also watched a live video of hibernating bears online. The video was from the North American Bear Center. It wasn't exactly a thrill a minute (it's a pretty dark picture), but when you did get a glimpse of the bears it was neat, and I think it help to solidify the idea of bears hibernating.
Unfortunately my T/TH class got the raw end of the deal on this. The bears hardly budged the entire class. All they could see was a big brown mass. The MWF class got a number of great views of the bears though so I think the other guys were just unlucky. I'll try to put it on for them again sometime.
Anyway, It was a lot of fun. I will definitely do it again next year. :)

Friday, January 21, 2011
This is a project we did as part of a unit on winter and polar animals. To create the template, I took the picture I found of a teddy bear outline, (http://twistynoodle.com) inserted it into word, and wrote "My polar bear's name is.." underneath it.
For the class... I gave the children just the glue and the template to start off, and I showed them how to cover the entire inside of the template with the glue. Next, we used medium sized cotton balls to stick to the glue. Once most of them were finished, I talked to the group about what the bear was missing. With a little encouragement they figured out that he needed eyes, a nose, and a mouth. I then set out some plates with various materials on them: cut pieces of string, buttons, pom poms, and googly eyes, and let the kids go for it.
I have these displayed in the room right now, and they are pretty hysterical. I have some with 20 eyes on them, and others with nothing but buttons.

The children got pretty creative with the names they gave their bears as well. We had our fancy bears: Gabriella and Eala. Our islander bears: Tiki and Jaga. Our country music bear: Hank-O-Mise. Our traditional bear: Snowflake. Our big bear: Tiny. And last but not least the undefinable (and my personal favorite): Chicken. :)
Like many of my projects, I adapted this idea from one I got online. It is quite simple actually... You give the children pasta wheels, and have them glue them together with regular school glue, give it a day or two to dry, then paint it with white paint and silver glitter. Once they're dry, you can tie a string on one end to make them into ornaments. (I didn't do this since it was past x-mas time when we did it).
 (These really weren't this shinny... it's just my flash.)
- Do this on wax paper. You don't want to have to pick them up until they are dry, and once dry they will just stick to anything else.
- School glue really does work, but try to make sure the children glue them in a bunch, not a line. I had some that did really neat designs pasting the wheels end to end, but they fell apart when I tried to remove them from the wax paper. An idea may be to draw little circles on the wax paper and ask the children to fill them in. I didn't do that.. it's just a thought.
- I used the small pasta wheels because I thought it would be a good fine motor activity for them. It was, but I do think they would have looked much grander if we had used the larger ones. I also think they probably would have been easier to paint.
All in all... it was a cute 2 day project the kids really enjoyed.
Thursday, January 20, 2011
I got the printout for this on Makinglearningfun.com. The idea is the same. You place the number of goldfish crackers on the penguins belly to match the number on its fin. However, I wrote the number on its belly instead, and placed dots in specific spots on the numbers. Why did I do this? Well... as a child I remember being very frustrated when I was told that I couldn't count on my fingers so I developed my own system of counting on the actual numbers. This was something that helped me immensely as a child, and something I would like to pass on to my students. You see, by counting on the numbers the children are connecting the physical amount that the number represents to the numeric symbol. My hope is that this will help them to identify numbers, count using numbers, and as one parent pointed out, in the future write numbers.
Here is the sheet I made:


I told them we were feeding the penguins, and the the penguins needed the number of crackers listed on their bellies. I made sure to that the children were counting the fish as they placed them on the dots.
 The children really took to this activity. It might have been the fact that they got to eat the goldfish once they finished :)
Tuesday, January 18, 2011
Okay... So this started out with the idea being that we would split up into teams, make walls with the large cardboard blocks, roll toilet paper into balls, and have a snowball fight. Instead it was more like a tearing, throwing, rolling, jumping, diving, super-crazy free for all.
And it was sooooo much fun!!
I had each child bring in one roll of toilet paper and we went crazy ripping and trowing it all around the room. The kids had a ball, and so did I, but there was one problem... lint. Holy &*^%) the lint!! It was so thick that I had to make the kids go outside to let it settle because it was starting to make us cough. Then, cleaning it up was ridiculous. I basically vacuumed the entire room.
I realized after the fact where I went wrong. You see, with my first class it wasn't so bad, but a lot of those parents had forgotten to bring in the TP, and I used some cheapo toilet paper I had on hand. I did, however, remember to send and email out to parents the night before my second class to remind them to bring a roll for their child so they all remembered. Well... I guess I have some families with sensitive tushies because I got some really high-class TP. And as you may know, the softer the toilet paper the more lint it creates. So my advice to anyone who would like to do this with their class is to get the cheapest, roughest, just short of sandpaper toilet paper you can find and go nuts! :)
This is such a simple idea, but it touches on so many important concepts: fine motor skills, ordering by size, and producing representational art.
For this activity I made white playdoh. (To make white play-doh, just follow the Homemade Play-doh Recipe and omit the food coloring). I also used some red play-doh that was ready to be replaced.
First, we talked about how a snowman looked. I drew a picture on the white board showing how a snow man was made up of three balls that got progesivly smaller as they were stacked on top of each other. Then, I showed (i.e. reminded :) ) the children how to roll play-doh into a ball by rolling it on the table. One at a time, we rolled the play-doh into 3 balls (small, medium, and large), and stacked them up largest to smallest. Next, we rolled the red play-doh into a snake, and placed it around the snowman's neck like a scarf. Finally, we added pipe cleaners for arms, and drew the faces on with marker. Here's one that a little girl in my class did. So cute!! Tip: Place them on wax paper and give them a couple days to dry. They harden nicely but are very fragile.
This was an activity we did as part of a unit on safety and community helpers. This activity was adapted from an one I found online. The online project called for painting a fire scene with the shadow of a house in front. I had two problems with this: 1. I would have to make the house for it to look right since the kids are too young to cut out windows and such, and 2. it seemed a bit morbid to me. So I figured out a way to make it less morbid, but also create a project the would help the children learn how the things we see are made out of shapes.
First, I had the children paint a white piece of paper with orange yellow and red paint. I told the kids to really glob the paint on. Then we placed saran wrap over the picture and rubbed it around to mix the colors, then quickly pulled it off in an upward motion to create the look of fire.
Next, I created some shapes that the children could use to make a shadow form of a fire truck. I made circles (wheels), squares (the cab), a large rectangle (truck), and a long rectangle (ladder). Then I showed the children how they could use these shapes to make the image of a fire truck, and let them past it on their paper. I think they turned out great!!
 I know, I know.. I'm a creative genius. :P
Saturday, January 8, 2011
This is an activity that's super-fun, but is also really good for number recognition.
First, I cut up blank index cards and numbered them 1-5. These were the "tickets." I made enough that every child in my class could have 5 tickets, but my class is small so this worked. (With a bigger class, it might be best to hand each child only a couple of tickets and rotate). Then I wrote the numbers 1-5 on full index cards.
For the activity, I told the children that we would be riding the number train, and handed out tickets. I held up my large ticket for number 1, and said "Boarding train number one. " Then I collected the children's tickets while doing the whole train conductor thing - saying "all aboard" and stuff like that. The children made a train by holding onto the shoulders of the person in front of them. I was the engine, and the children were the cars. We went once around the room making train noises, then stopped back at the "station" (i.e. blocks center) where the passengers on train #1 got off. This process was repeated over and over until all the trains (1-5) were boarded.
It was a ton of fun and the children wanted to do it over and over again.
Thursday, November 4, 2010
This is such a fun and easy sensory activity for little ones. Best of all, it's completely non-toxic. The neat thing about goop is that it feels solid when you pick it up, but melts in your hands. The children were so fascinated by this (at least the ones that would get their hands dirty :P) that they kept playing with it for probably 45 or more minutes.
Ingredients
- Cornstarch
- Water
Directions:
- You will want to start with a little bit of cornstarch in the sensory bin (approximately 2 cups). Ask the children to describe how it feels.
- Next, add and equal amount of water, and have the children mix it until the cornstarch is mostly dissolved.
- Continue adding cornstarch and water until your sensory bin/ table is filled and it is the consistency you like.
Depending on the ratio of water to cornstarch, the goop will behave differently. Play with it and explore how it feels. It's super fun!
***Tip: Do this outside. It gets really messy, but is a breeze to clean up with the hose.***

This was a great activity that I wanted to share. I did it for Halloween, but you could also do it for Thanksgiving.
I got a large carving pumpkin and placed it in my sensory bin (outside - this gets messy). First, I asked the children what was inside the pumpkin (teasing them that it was full of kitty cats or bunnies, etc.). Next, I cut open the pumpkin and we all removed the insides and placed it in the sensory table for them to explore. We talked about how the pumpkin insides felt - wet, slimy, slippery etc. and worked together to separate the seeds from the stringy goop. (I reserved a few seeds for us to plant in the garden.) I explained to the children that we were going to cook the pumpkin seeds, and filled up a pot to boil water on the stove. We boiled our seeds for 10 minutes on high heat. Afterward, the children helped me stir butter into the seeds, spread them on the pan, and sprinkle salt over them. We placed the seeds into the oven (275 degrees) and cooked them until browned.
Later we took the reserved seeds and insides, and planted them in the garden in the backyard. We'll see if they grow. :)
The great thing about this activity is that it was like a million lessons in one:
- We predicted what was inside the pumpkin
- Used our vocabulary to describe how the pumpkins insides felt
- Worked our fine motor skills removing the seeds from the stringy insides
- Discussed how water boils (I asked them questions like: "how do we boil water? and "What does water look like when it's boiling?" I also showed them what the water looked like when it was boiling)
- We talked about stove and oven safety
- Learned about how butter melts when heated up
- Counted the number of minutes to boil the water and cook the seeds
- Saw how the seeds changed when cooked
- Planted the seeds in the garden.
***And when we were done with the pumpkin, I got a bunch of tees and we beat them into the pumpkin using plastic hammers - a good gross motor activity. ***
Overall, this was an awesome activity. My only complaint is that the seeds took too long to cook, and they weren't finished before the children went home. My oven is a little strange (gas) and sometimes recipes take longer than they should to cook in it. Next time, I will have to cook them at a higher heat.
Wednesday, August 25, 2010
I thought I would take a moment to share my centers with other teachers (or parents) who might be looking for ideas on how to put together an attractive and economical classroom. I've had a ton of fun putting these classrooms together. My goal has been to make something beautiful and whimsical, but also functional. I hope you like them. :)
I have two rooms that I use for my school.
THE BLUE ROOM - The main classroom is what I call the "noisy room" and contains the dramatic play, blocks, art, and music centers.


DRAMATIC PLAY- The kitchen was a gift from Santa for my kids a year before I started the program. It is, by far, the most expensive thing in the room. The dress up clothes are hung up on command strip hooks. They're cheap and easy to move around. They can, and will, pull the drywall off your wall if pulled too hard as you can see in this picture. I will fix it...eventually. ;) I also use crates a lot to hold things. They're tough, cheap and don't look to bad when used sparingly. For the small figures, animals, cars trucks etc. I organized them into separate bins with labels I created using clip art.
 ART - In my art center, I have an easel (one is all I have the room for) and a shelf full of art materials that the children have free access to: play-doh and play-doh tools, paper, markers, paints, recycled art materials, tape, white and colored glue, scissors, stickers, and of course, paper.If you look at the top of the image you will be able to see the little foil stars suspended from the ceiling. These cover the ceiling of the entire room. They are simply stars cut from foil and hung using fishing wire.
MUSIC - My radio is the only thing off limits in the room, for obvious reasons, but the children have free access to a range of musical instruments. The larger instruments are on the shelf and the smaller ones are in the crate. They can also use headphones to listen to music if they wish. You can see on the side of the shelf where I took a page from a torn touch and feel book and taped it there for the children to enjoy. I actually took apart the entire book (after Olivia destroyed it), cut it up and taped the pages all over both of the rooms.
 BLOCKS - I got these Melissa and Doug blocks (2 sets) with coupons at A.C. Moore. I just couldn't find a better deal anywhere else. The shelf is just a simple book shelf. I placed the blocks next to the dramatic play area so the blocks can be incorporated into the children's play with the small figures and vehicles.
THE RED ROOM - This room is called the red room for obvious reasons. It is also the quiet room. It contains the manipulative, reading, writing and science centers.
 READING CORNER - This is my favorite spot in the whole school. This is where the children can go read a book or get away and snuggle with a stuffed animal. I created the space by turning my old china cabinet to the side and attaching a piece of cloth to the back. The couch is actually a toddler bed with a folded mattress pad on the bottom and pillows lining the back. The canopy is one that you would put over a child's bed.
 WRITING - My writing center is simply my old coffee table with different sized markers, pens, various kinds of paper and stencils on it. I used a Closet-maid shoe storage cubby for mailboxes. Since my students are still at the pre-reading level, each of their mailboxes is labeled with their names and a symbol they each got to choose before school started. Children can recognize a simple symbol more readily than they can a name so they are able to tell who's box is who's, at the same time they are learning that written symbols can have abstract meanings.
 MANIPULATIVES - Manipulatives take up a large portion of the red room. This is probably because I don't separate them into math, language, etc. I have puzzles and games available in the china cabinet to the right of this shelf. My manipulatives vary from Mr. Potato Head to Montessori's Pink Tower.
The children use the manipulatives how they wish. If they want to build the tower from largest to smallest - great. If they want to put the blocks into cups and pretend they're tea - that's cool too.
 I rotate the materials on low tables to encourage the children to try new things and to keep up their interest. In this picture I have magnablocks on the small table and number peg cards and dressing boards on the longer table. The shelf is for displaying artwork and setting art to dry.
 SCIENCE - My science center is small. Really, the outside area is the best science center in my opinion. I also do a lot of science related projects with the children, but I have this center available to them all the time. In my science center, I keep plants, binoculars, magnifying glasses and items for them to look at (shells, rocks, bark). I also have a kaleidoscope and some VERY cool magnets.
Thursday, August 5, 2010
This was sooo much fun! It's messy though. Remember to put paint shirts on the kids, and be prepared with paper towels and spray cleaner.
First you have to make the ice cubes. Here's what you'll need:
- Ice cube trays
- Popsicle sticks (you can get small ones or break them in half)
- Aluminum foil
- Liquid watercolors (This is the key. Using food coloring does not turn out nearly so bright and colorful. I have only found these at Discount School Supply.)
Here's how to make them:
- Take the ice cube tray and fill each section 3/4 of the way full with the liquid watercolors. I used red, yellow, and blue so the children could see how those colors blend to make secondary colors. One tray will go a long way. I used one for about 10 kids, and I had a good bit left over.
- Next fill each section the rest of the way with water.*
- Place the foil over the entire tray pressing it down so you can see the divisions between the sections.
- Finally, push a popsicle stick through the foil in each section (you may want to pierce the foil with a knife first). The foil will hold the sticks up straight until the water freezes.
- Let it freeze overnight.
The activity:
Before you begin, explain to the children that these are paints and must not be eaten. They're non-toxic, but do temporarily stain the skin. Twist the tray to release the cubes, and place them in a small container in the middle of the table for the children to share. These totally bleed through paper, but are pretty easy to clean off of hard surfaces. Clothes, however, well that remains to be seen. :P
Here are a few of the pictures. The lighting isn't the best. They are even prettier in person!

* Be careful to leave a little space at the top, or you'll have nothing but brown ice cubes. ;)
This was a wonderful idea, (stolen from Sid the Science Kid) poorly executed. This is definitely one of those activities where YOU can learn from my mistakes. Here's what I did....
The children and I put a bunch of fruit (i.e. grapes and strawberries) in a large Tupperware, filled it with water, covered it, and placed it in the freezer. We talked about what we thought would happen to the water and fruit. Some of the kids said they would turn into popsicles. I thought that was cute. :) The following class, I took the container out of the fridge and dumped the, now, big block of ice into a large bin. Then, the children felt the ice, and gave me ideas of how we could get to the fruit inside. I got ideas like: put it in the pantry, put it in the closet, melt it with cold water, melt it with hot water, etc.
Good so far, right? Here's where things start to fall apart.
We decide to melt it with hot water. So I gave each child a cup of water to pour over top of the ice, and I had a large pitcher. We counted one... two.. three.. and poured. Oops! The ice melted, but not enough to release any fruit. I had to go back to the sink (all the way in the kitchen) about 5 times. Meanwhile, the children were getting bored. Finally, all the ice melted, and we got the fruit. The grapes were wonderful, but the strawberries were mushy - I probably should have anticipated that. I also probably should have anticipated that getting a huge bin full of water out of the room might be difficult. I picked it up, one side gave way and - SPLASH - it went all over the floor. I raced to the sink to dump what was left, spilling much more water in the process, and proceeded to race around the room trying to clean up all of the water before someone fell. In the end, the kids really enjoyed it. I, on the other hand, did not.
However, I can learn from my own mistakes!!!
I did a few things differently with my other class. First of all, I did it outside - MUCH BETTER! Second, I was prepared with a couple pitchers. The strawberries still stunk though. Next time, I will only use grapes.
Tuesday, June 29, 2010
We are currently learning all about plants, and I wanted to help the children learn about seeds in a way that was fun and hands-on. This was definitely it.
I purchased some fruits and vegetables at the store: tomatoes, green beans, lemons, oranges, cucumbers, and grapes. After talking about how plants grow from seeds, I sat the children down at the table and told them that we would be looking inside all of the fruits and vegetables to see what kinds, and how many, seeds they had. One at a time, I showed them a fruit or vegetable and had them take turns guessing how many seeds were inside it. Then, I cut it open, and we counted the number of seeds to see who was the closest..... then we ate them.
The children had a ton of fun guessing the number of seeds and eating the yummy fruits and vegetables. Not only was it a fun way to learn about seeds, but we got to make predictions and practice counting as well. :)
***A great book that we read to go along with this activity was "A fruit is a Suitcase for Seeds by Jean Richards."***

